Help needed: Import a Web page to excel, filter and email results

Hi - I was wondering if anyone could point me in the right direction for a task I wish to complete - I am open to any soloution e.g Shortcut/Keyboard Maestro/Python etc. What I need to do is

Create a macro to import the information from the webpage below to excel for mac/office 365:

https://www.flightradar24.com/data/airports/bfs/arrivals.

I then need to:

  • Scrape/import web page above.
  • Import to excel for mac/office 365
  • Resize colums to neatly fit the text text
  • Remove the any redundant text such as “Sorry, we don’t have any information about flights for this airport”
  • Insert the following Header rows – Time, No, Airport, No, Reg, Operator, Time Between Flights
  • Freeze header so when scrolling the headings remain fixed in place
  • Remove/filter all UK domestic flights – e.g London, Liverpool, Manchester, Bristol, Birmingham, Edinbrugh, Glasgow so they are not seen on the spreadsheet.
  • Calculate the times between these flights/arrivals in a separate column (ie calulate the times between flights after the filter has been applied.
  • Make the font bigger
  • Email a copy to me.

Any help appreciated!

That’s quite the ‘shopping list’.

First thing’s first. Flightradar24 do have a commercial offering that gives you direct data access. That would be by far your easiest approach for getting a nice CSV file that you can then do your processing on. Otherwise, I think you have the following fundamental requirements to which I’ve made some suggestions.

1. Get web page content

Quickest way to grab content might be via a shell scrpt using curl, but most languages and automation solutions will offer yoyu a way to do that.

2. Process the page

The key to this is going to be either using something that understands the HTML document model, I think Python has the most approachable libraries for that, or given you have a narrow scope and are unlikely to get much variation, any language or tool supporting regular expressions will probably get you through.

In addition anything you are stripping out as extraneous information ("Sorry ‘’’, etc.) is just a find the text and replace it with an empty string.

3. Get Data into Excel

I don’t use a recent version of Excel on the Mac, and in fact I rarely use it on the Mac at all; though practically daily on Windows. I believe your de facto way forward here is through VBA (Visual Basic for Applications). You can programmatically tell a spreadsheet to do things. Now you might be able to trigger stuff with AppleScript, but even if you couldn’t, you should be able to set-up a spreadsheet with an auto execute on open macro that then loads in the data from the file you generate from the previous steps.

4. Fomat Excel

If you are using a standard template, you can set-up the vast majority if not all of your requirements about columns, fonts, frozen panes, etc. You probably wll need to use a bit of VBA to auto size the columns once the data is imported if you want to ensure ‘perfect sizing’ that is neither over or under-sized based on the template’s defaults.

5. Additional Calculations

If you set your template up with the calculations (HINT: use IF() functions to check for data in a row. If it is there, do your calculations based on OFFSET(), otherwise output an empty string), you’ll just get the data out the otherside. Excel is a formidable spreadsheet solution and as such is primed for date/time calculations.

6. Email

Once Excel has imported and formatted your data, I guess the most straight forward option, if available, would be to have it save (and close) the resulting updated file to a folder that is watched by Hazel, that then triggering the mailing of the file as an attachment to your desired e-mail address.

There are certainly many ways to accomplish this process, and I dare say there are elements of the process that would be worth querying to better understand the underlying requirements if I were trying to develop a solution.

Not to be answered obviously, but I’d be thinking about things like these:

  • Is all the data relevant?
  • Is this being archived in some way and should that be accounted for?
  • Does it need to be e-mailed?
  • How is the Excel processed once the e-mail is received.

Anyway, hopefully that helps you with at least a few suggestions for what you laid out.

Hi Sylumer,

Thanks for taking the time to answer and provide this thoughtful and comprehensive answer - it’s much appreciated. I’ll go through the steps you suggest - I don’t know anything about curl/VBA but I guess it will prove a useful way to learn by doing this project!
Apart from anything else most office based jobs seem to involve taking data in one format and sorting it into another so hopefully learning the soloution will prove useful in other scenarios.
Thanks again for the reply.

Python is my go-to programming language, so if this were for me, I would end up writing a script to do the whole thing.

  • requests is a very powerful, well-written python library for fetching the contents of web pages
  • BeautifulSoup is a decent python library for parsing HTML and extracting the bits you need
  • Python itself is capable of all the filtering, text stripping, and formatting you may need
  • There are python Excel libraries for creating .xlsx files - I don’t know the extent of their capabilities, but they could probably achieve a decent amount of what you need
  • python can send emails natively, with attachments - so you can use the above tools to fetch the URL, parse the bits you need, create an Excel file, and email it to yourself - all without having to open an app.

If I get some time tomorrow I could probably write a toy example if it would be helpful?

Hi Bencardi,

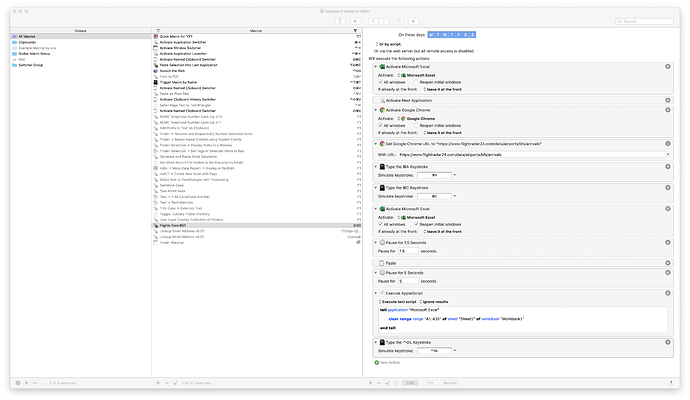
It sounds like Python could be the answer to a lot of the problems I’m facing - after about 5 or 6 hours I’ve cobbled together some “Frankencode” using Keyboard Maestro and Applescript -

It still leaves me with a number of issues though such as applying filters to the excel sheet and leaving a huge gap at the top of the sheet once the irrelevent stuff has been removed so if you could make a toy example it would be a huge help - if you could include an idiots guide to installing the code it would be appreciated as I am a newbie to Python (though I think after this I’ll start to learn it as it seems to be useful for this kind of task)
Thank you for taking the time to reply.

Okay, so I threw together the quick example below. Unfortunately, FlightRadar loads those tables with Javascript, so just using the “requests” python module to get the HTML isn’t enough. I’ve had to change to using Selenium to actually launch Safari, load the page, and then get the source.

That said, it seems to work. It creates an Excel file, with most (if not all?) of the formatting you’ve asked for, and saves it. It doesn’t actually do the emailing, in hindsight I think that’s better off done with something external rather than setting up an SMTP server for Python to use :wink:

Let me know if you have any questions. It’s written for Python3, and you need to install xlsxwriter, selenium and bs4. I did that using pip3, which you can install with Homebrew, and then run pip3 install --user xlsxwriter selenium bs4.

Obviously, any of the code can be changed to suit your needs if necessary.

#!/usr/bin/env python3

import datetime
import time
import xlsxwriter
from selenium import webdriver
from bs4 import BeautifulSoup


EXCEL_FILE = 'flights.xlsx'
URL = 'https://www.flightradar24.com/data/airports/bfs/arrivals'


def main():

    with xlsxwriter.Workbook(EXCEL_FILE) as workbook:

        worksheet = workbook.add_worksheet()

        row_height = 20
        font_size = 16

        big_font_format = workbook.add_format({'font_size': font_size})
        date_format = workbook.add_format({'num_format': 'yyyy-dd-mm hh:mm', 'font_size': font_size})
        minute_format = workbook.add_format({'num_format': 'hh:mm', 'font_size': font_size})
        bold_format = workbook.add_format({'bold': True, 'font_size': font_size})

        # Freeze the first row
        worksheet.freeze_panes(1, 0)

        # Define the column headers, make the font and row heights bigger
        headers = ['Time', 'No', 'Airport', 'Code', 'Reg', 'Operator', 'Time Between Flights']
        worksheet.set_row(0, row_height)

        # Write the headers to the first row (row 0)
        for col, header in enumerate(headers):
            worksheet.write(0, col, header, bold_format)

        # Initial column widths
        col_widths = [25, 5, 10, 7, 5, 10, 25]

        soup = False

        # Fire up Selenium to fetch the website
        with webdriver.Safari() as driver:

            driver.get(URL)

            # Wait for the page to fully load etc (not sure if this is necessary)
            time.sleep(2)

            # Parse the contents of the page
            soup = BeautifulSoup(driver.page_source, features='html.parser')


        if soup:

            year = str(datetime.date.today().year)
            date = ''
            row_num = 1
            # Iterate over the table rows
            for row in soup.find('tbody').findAll('tr'):
                # If the row tells us the date, store it for later
                if 'row-date-separator' in row.attrs['class']:
                    date = row.text + ' ' + year
                    continue
                tds = row.findAll('td')
                # Skip any rows that don't have enough columns
                if len(tds) < 6:
                    continue
                # Skip any rows where the airport is in the United Kingdom
                if 'United Kingdom' in row.findAll('td')[2].find('a').attrs['title']:
                    continue
                # Pull out the data we want
                flight_data = {
                    'time': date + ' ' + tds[0].text.strip(),
                    'flight': tds[1].text.strip(),
                    'from_airport': tds[2].find('span').text.strip(),
                    'from_airport_code': tds[2].find('a').text.strip().strip('()'),
                    'airline': tds[3].text.strip().strip('- '),
                    'aircraft': tds[4].find('span').text.strip(),
                    'aircraft_code': tds[4].find('a').text.strip().strip('()'),
                    'status': tds[5].text.strip(),
                }
                # From that, format it how we want in Excel, and add the calculation for the last column
                cols = [
                    (datetime.datetime.strptime(flight_data['time'], '%A, %b %d %Y %I:%M %p'), date_format),
                    (flight_data['flight'], None),
                    (flight_data['from_airport'], None),
                    (flight_data['from_airport_code'], None),
                    (flight_data['aircraft_code'], None),
                    (flight_data['airline'], None),
                    ('=A{}-A{}'.format(row_num + 1, row_num) if row_num > 1 else '', minute_format),
                ]

                # Calculate the width of the column
                # I chose a "magic number" of "number of letters x 1.8" to hopefully be a nice fit
                # You can't use "autofit" like Excel does when you double-click the
                # dividers, as that's only available when Excel is running
                for col, width in list(enumerate(col_widths))[1:-1]:
                    col_widths[col] = max(col_widths[col], len(cols[col][0]) * 1.8)

                # Set some formatting options and write the row
                worksheet.set_row(row_num, row_height, big_font_format)
                for col, (data, field_format) in enumerate(cols):
                    worksheet.write(row_num, col, data, field_format)
                row_num += 1

            # Set the workbook column headers
            for col, width in enumerate(col_widths):
                worksheet.set_column(col, col, width)


if __name__ == '__main__':
    main()
You may actually be able to use requests. Looking at how the page loads, the data is available in JSON from this url. The request headers don’t have any tokens, so you should be able to call it directly, you just have to set the timestamp in the url to the current time

https://api.flightradar24.com/common/v1/airport.json?code=bfs&plugin[]=&plugin-setting[schedule][mode]=&plugin-setting[schedule][timestamp]=1560784122&page=1&limit=100&fleet=&token=

In which case, it’s even easier. You don’t need BeautifulSoup either, you just have beautiful JSON to work with instead!

Apologies, if I had dug deeper into the Javascript I could have found that. Still, I’ve never used Selenium before so that was fun.

Here you go, a version that uses the JSON from the API rather than Selenium. It’s cleaner, but I don’t like having to fake the User-Agent to pretend to be a real browser (FlightRadar returns a 418 status if it thinks you’re trying to scrape its data).

#!/usr/bin/env python3

import time
import requests
import xlsxwriter
from datetime import datetime


EXCEL_FILE = 'flights.xlsx'
URL = 'https://api.flightradar24.com/common/v1/airport.json?code=bfs&plugin[]=&plugin-setting[schedule][mode]=&plugin-setting[schedule][timestamp]={}&page=1&limit=100&fleet=&token='

def main():

    with xlsxwriter.Workbook(EXCEL_FILE) as workbook:

        worksheet = workbook.add_worksheet()

        row_height = 20
        font_size = 16

        big_font_format = workbook.add_format({'font_size': font_size})
        date_format = workbook.add_format({'num_format': 'yyyy-dd-mm hh:mm', 'font_size': font_size})
        minute_format = workbook.add_format({'num_format': 'hh:mm', 'font_size': font_size})
        bold_format = workbook.add_format({'bold': True, 'font_size': font_size})

        # Freeze the first row
        worksheet.freeze_panes(1, 0)

        # Define the column headers, make the font and row heights bigger
        headers = ['Time', 'No', 'Airport', 'Code', 'Reg', 'Operator', 'Time Between Flights']
        worksheet.set_row(0, row_height)

        # Write the headers to the first row (row 0)
        for col, header in enumerate(headers):
            worksheet.write(0, col, header, bold_format)

        # Initial column widths
        col_widths = [25, 5, 10, 7, 5, 10, 25]

        response = requests.get(URL.format(int(time.time())), headers={'User-Agent': 'Mozilla/5.0 (Macintosh; Intel Mac OS X 10_14_4) AppleWebKit/605.1.15 (KHTML, like Gecko) Version/12.1 Safari/605.1.15'})
        data = response.json()

        row_num = 1

        for item in data['result']['response']['airport']['pluginData']['schedule']['arrivals']['data']:

            flight = item['flight']

            if flight['airport']['origin']['position']['country']['code'] == 'GB':
                continue

            cols = [
                (datetime.fromtimestamp(flight['time']['scheduled']['arrival']), date_format),
                (flight['identification']['number']['default'], None),
                (flight['airport']['origin']['name'], None),
                (flight['airport']['origin']['code']['iata'], None),
                (flight['aircraft']['registration'], None),
                (flight['airline']['name'], None),
                ('=A{}-A{}'.format(row_num + 1, row_num) if row_num > 1 else '', minute_format),
            ]

            # Calculate the width of the column
            # I chose a "magic number" of "number of letters x 1.8" to hopefully be a nice fit
            # You can't use "autofit" like Excel does when you double-click the
            # dividers, as that's only available when Excel is running
            for col, width in list(enumerate(col_widths))[1:-1]:
                col_widths[col] = max(col_widths[col], len(cols[col][0]) * 1.8)

            # Set some formatting options and write the row
            worksheet.set_row(row_num, row_height, big_font_format)
            for col, (data, field_format) in enumerate(cols):
                worksheet.write(row_num, col, data, field_format)
            row_num += 1

        # Set the workbook column headers
        for col, width in enumerate(col_widths):
            worksheet.set_column(col, col, width)


if __name__ == '__main__':
    main()

Guys,

Thanks a million for this - I’ll have a go at installing it and getting it up and running and spend a bit of time working out which bits of the code do what!
Thanks again!