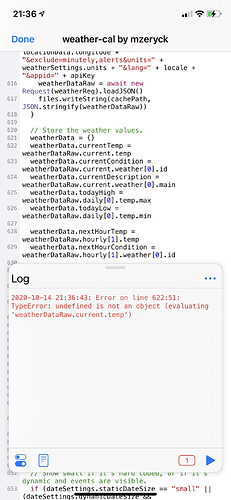
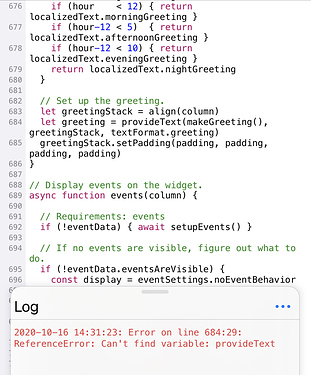
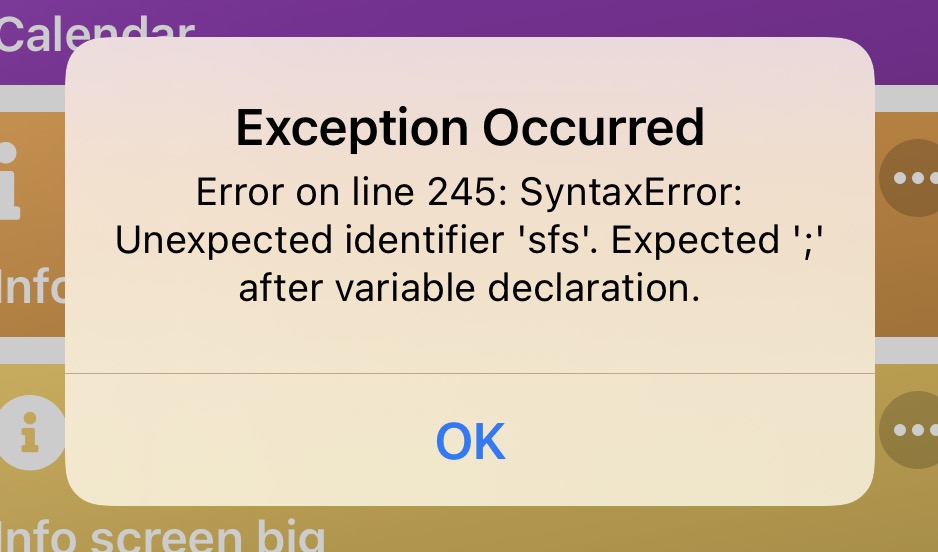
I’ve set the widget up according to the instructions in the code, but I’m getting this error. Any thoughts?
You’ll need to get a free OpenWeather API key here, and paste it into the apiKey variable (so apiKey = "abcdefg"). Even after you do that, sometimes it takes a few hours to activate.
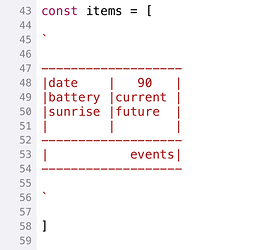
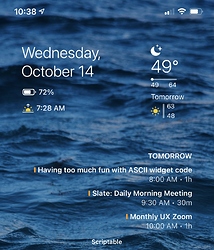
I think some folks here might get a kick out of this. I made an ASCII widget generator. Code is here, the main setup instructions are here (“Before you start”). Make columns with pipes and a line of dashes for a new row. It’ll obey the alignment of each element to the left, right, or center. And you can optionally specify the column width with a number at the top.
IDK why I did this. But I sure had fun. Cheers.
Nice work. I wrote some curve smoothing code for my (unfinished) weather widget that might be helpful:
function lineGraph(data, context) {
  let max = Math.max(...data)
  let min = Math.min(...data)
  let xFactor = context.size.width / (data.length - 1)
  let yFactor = context.size.height / (max - min)

  function scalePoint([x, y]) {
    let xScaled = x * xFactor
    let yScaled = context.size.height - (y - min) * yFactor
    return new Point(xScaled, yScaled)
  }

  function controlPoint(current, previous, next, reverse) {
    const smoothing = 0.2
    const p = previous || current
    const n = next || current
    const dx = n[0] - p[0]
    const dy = n[1] - p[1]
    const angle = Math.atan2(dy, dx) + (reverse ? Math.PI : 0)
    const length = Math.sqrt(Math.pow(dy, 2) + Math.pow(dy, 2)) * smoothing
    const x = current[0] + Math.cos(angle) * length
    const y = current[1] + Math.sin(angle) * length
    return [x, y]
  }

  let path = new Path()

  data.map((d, i) => [i, d]).forEach((p, i, a) => {
    if (i === 0) {
      path.move(scalePoint(p))
    } else {
      let cps = controlPoint(a[i - 1], a[i - 2], p)
      let cpe = controlPoint(p, a[i - 1], a[i + 1], true)
      path.addCurve(scalePoint(p), scalePoint(cps), scalePoint(cpe))
    }
  })
  context.addPath(path)
  context.strokePath()
}
Thanks for this! It’s now in a stack on my second page. 
@rob would you mind posting your code for this one? If not no worries… I’ll be off to the Strava API docs! — jay
EDIT: Ugh… OAuth… my nemesis! I’m wondering if this post relates to your Strava work.
@mzeryck Your work keeps getting better, thanks for sharing.
Question: How do I limit calendar events to just a couple of calendars? I have many work and family calendar loaded on my phone.
Yes, that was related.
For the OAuth part you can look into the post from the Scriptable author.
This is how I get the data after OAuth completed:
async function getData() {
  if (!Keychain.contains(Keys.accessToken)) { return null }
  const accessToken = Keychain.get(Keys.accessToken)
  const activitiesURL = `${baseURL}/api/v3/athlete/activities?after=${StartDate}`
  const request = new Request(`${activitiesURL}&access_token=${accessToken}`)
  const result = await request.loadJSON()
  const activities = result.filter(activity => activity.gear_id == Bike)
  const distance = sum(activities.map(activity => activity.distance / 1000))
  const duration = sum(activities.map(activity => activity.moving_time / 3600))
  return [distance, duration]
}

function sum(array) {
  return array.reduce((x, y) => { return x + y }, 0)
}
Hope that helps!
Thanks. I’m in over my head, but it gives me something to learn!
The widget was properly set up and had been working fine for a couple of weeks before I started getting that error.
Here’s a Custom Widget Maker for iOS/IPadOS 14. It’s still WIP, but you’ll get the basic gist of it.
Here’s the code (click to reveal):
// Menu constructor. Feel free to use.
function Menu() {
	let m = new Alert()

	this.title = function(menuTitle) {
		m.title = menuTitle
	}

	this.addButton = function(title) {
		m.addAction(title)
	}

	this.presentMenu = function() {
		return m.presentAlert()
	}
}

var m = new Menu()
m.addButton("Quit")
m.addButton("New Widget")
m.title(Script.name())
var choice = await m.presentMenu()

if (choice==0) return

// Show basic widget UI
log("New Widget")
let w = new ListWidget()
var grad1 = "ffffff"
var grad2 = "ffffff"

var compiledWidget = "let widget = new ListWidget();"


for (i=0;i < Infinity;i++) {

m = new Menu()
m.addButton("Add Text Element")
m.addButton("Background Gradient")
m.addButton("Custom Code")
m.addButton("Preview")
m.addButton("Compile")
m.addButton("Quit")

choice = await m.presentMenu()
// Quit script
if (choice==5) return
// Add Text
if (choice==0) {
	let a = new Alert()
	a.addTextField("Text", "Example")
	a.addTextField("Text Size", "15")
	a.addAction("OK")
	await a.present()
	let text = a.textFieldValue(0)
	let size = a.textFieldValue(1)
	let newText = w.addText(text)
	newText.font = new Font("", parseInt(size))

	var compiledWidget = compiledWidget +' var text = widget.addText("'+text+'"); text.font = new Font("",'+size+');'
}
// Background
if (choice==1) {
	let a = new Alert()
	a.message = "Use hex codes for widget gradient."
	a.addTextField("Top Color", grad1)
	a.addTextField("Bottom Color", grad2)
	a.addAction("OK")
	await a.present()
	var grad1 = a.textFieldValue(0)
	var grad2 = a.textFieldValue(1)
	let newGradient = new LinearGradient()
	newGradient.colors = [
	new Color(grad1),
	new Color(grad2)
	]
	newGradient.locations = [0,1]
	w.backgroundGradient = newGradient
}
// Preview
if (choice==3) {
	await w.presentMedium()
}
// Compile
if (choice==4) {
	compiledWidget = compiledWidget+'	let newGradient = new LinearGradient(); newGradient.colors = [new Color("'+grad1+'"),new Color("'+grad2+'")]; newGradient.locations = [0,1]; widget.backgroundGradient = newGradient;'
	compiledWidget = compiledWidget+' widget.presentMedium()'
	Pasteboard.copy(compiledWidget)
	let alert = new Alert()
	alert.message = "Your widget has been compiled. Make a new Script and paste the code!"
	alert.addAction("OK")
	await alert.presentAlert()
	}


}
log("Script stopped")
You can easily add text to your widget, and customize the background gradient. That’s it for now.
Preview your widget before saving it.
To save the widget, press “Compile” and then make a new script. Paste the newly copied code into that script, and set it as a widget.
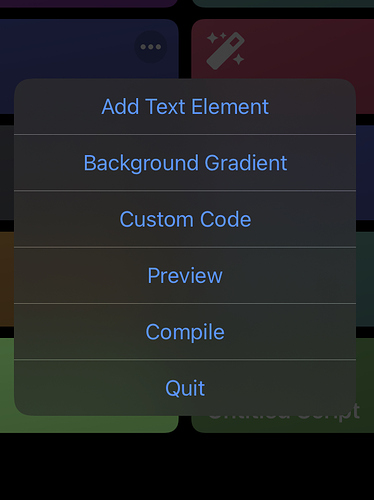
Here’s a screenshot of the main menu:
[please not that custom code does nothing as of yet.]
Great work and this looks awesome!! Is this in the App Store yet?
Thanks.
Well, it isn’t an app, so no. I made a script… to make more scripts. Since I posted this at 10:00 last night, I forgot to put the actual code. Oops. I’ll fix that. 
Ok, I put the code. If you’d like to try it, copy this:
Click to show
// Menu constructor. Feel free to use.
function Menu() {
	let m = new Alert()

	this.title = function(menuTitle) {
		m.title = menuTitle
	}

	this.addButton = function(title) {
		m.addAction(title)
	}

	this.presentMenu = function() {
		return m.presentAlert()
	}
}

var m = new Menu()
m.addButton("Quit")
m.addButton("New Widget")
m.title(Script.name())
var choice = await m.presentMenu()

if (choice==0) return

// Show basic widget UI
log("New Widget")
let w = new ListWidget()
var grad1 = "ffffff"
var grad2 = "ffffff"

var compiledWidget = "let widget = new ListWidget();"


for (i=0;i < Infinity;i++) {

m = new Menu()
m.addButton("Add Text Element")
m.addButton("Background Gradient")
m.addButton("Custom Code")
m.addButton("Preview")
m.addButton("Compile")
m.addButton("Quit")

choice = await m.presentMenu()
// Quit script
if (choice==5) return
// Add Text
if (choice==0) {
	let a = new Alert()
	a.addTextField("Text", "Example")
	a.addTextField("Text Size", "15")
	a.addAction("OK")
	await a.present()
	let text = a.textFieldValue(0)
	let size = a.textFieldValue(1)
	let newText = w.addText(text)
	newText.font = new Font("", parseInt(size))

	var compiledWidget = compiledWidget +' var text = widget.addText("'+text+'"); text.font = new Font("",'+size+');'
}
// Background
if (choice==1) {
	let a = new Alert()
	a.message = "Use hex codes for widget gradient."
	a.addTextField("Top Color", grad1)
	a.addTextField("Bottom Color", grad2)
	a.addAction("OK")
	await a.present()
	var grad1 = a.textFieldValue(0)
	var grad2 = a.textFieldValue(1)
	let newGradient = new LinearGradient()
	newGradient.colors = [
	new Color(grad1),
	new Color(grad2)
	]
	newGradient.locations = [0,1]
	w.backgroundGradient = newGradient
}
// Preview
if (choice==3) {
	await w.presentMedium()
}
// Compile
if (choice==4) {
	compiledWidget = compiledWidget+'	let newGradient = new LinearGradient(); newGradient.colors = [new Color("'+grad1+'"),new Color("'+grad2+'")]; newGradient.locations = [0,1]; widget.backgroundGradient = newGradient;'
	compiledWidget = compiledWidget+' widget.presentMedium()'
	Pasteboard.copy(compiledWidget)
	let alert = new Alert()
	alert.message = "Your widget has been compiled. Make a new Script and paste the code!"
	alert.addAction("OK")
	await alert.presentAlert()
	}


}
log("Script stopped")
You can update the selectCalendars array in the event settings! Just use the name of the calendar, like this:
,selectCalendars: ["Home", "Work"]
Hmm, that’s weird. Does it happen if you run the script inside Scriptable itself? I can look at my caching code which may be the issue here.
To change the SFSymbol size in @mzeryck’s addition to @egamez’s weather widget, this works for me:
I turned this line:
return SFSymbol.named(symbols[conditionDigit]()).image
…into this:
let sfs = SFSymbol.named(symbols[conditionDigit]())
sfs.applyFont(Font.systemFont(25))
return sfs.image
… where ‘25’ defines the size. Then in this line:
drawImage(symbolForCondition(condition,condDate), spaceBetweenDays * i + 40, 165 - (50*delta));
…I changed ‘40, 165’ to ‘34, 162’ to align them back to the line.
Edit: If you merged SFSymbols into other code than the one in post #217, this won’t work. You’ll have to tweak sizes and position according to given Widget parameters.
__
To make the accent-Color line appear at sunrise-time after sunset as well, I changed this line:
if(i < hoursToShow)
drawLine(spaceBetweenDays * (i) + 50, 175 - (50 * delta),spaceBetweenDays * (i+1) + 50 , 175 - (50 * nextDelta), 4, (hourData.dt > weatherData.current.sunset?Color.gray():accentColor))
…into this:
Edit: Yeah, still buggy. After sunset, the next sunrise still won’t show until midnight because the code always looks at todays sunrise. Tweaking on…
if (i < hoursToShow)
    if (hourData.dt > weatherData.current.sunset)
    	drawLine(spaceBetweenDays * (i) + 50, 175 - (50 * delta),spaceBetweenDays * (i+1) + 50 , 175 - (50 * nextDelta), 3, (hourData.dt > weatherData.current.sunset? Color.darkGray():accentColor))
    else drawLine(spaceBetweenDays * (i) + 50, 175 - (50 * delta),spaceBetweenDays * (i+1) + 50 , 175 - (50 * nextDelta), 3, (hourData.dt < weatherData.current.sunrise? Color.darkGray():accentColor))
Edit: Added line breaks.
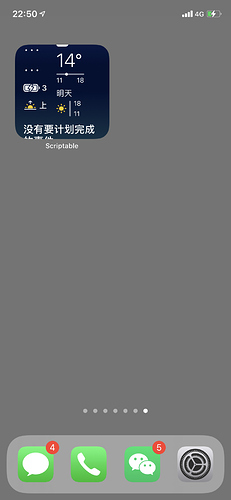
I got a new OpenWeather account, deleted the script, then set everything up again and so far so good. Let’s see for how long. But then I bumped into another thing: I was trying to add a countdown code into yours so it would be displayed right after the battery status. I followed your instructions on GitHub and I’ve tried it many times but also end up with this:
I’m obviously still learning, but isn’t it weird that it cannot find something that is being used literally everywhere else in the widget? And why is it messing up with things that were already there before and were working perfectly fine before I added some random code somewhere else?
